

TexasMac's Web Site
| MAKING A BLOW TUBE FOR BPCR SHOOTING By Wayne McLerran |
A Couple of Final Suggestion:
Regardless of the blow tube construction, keep the nipple and tubing
as short as comfortably possible in order for most of the moisture to
reach the bore rather than condense on the inside of the blow tube.
If you decide to make your own blow tube, make two in case one is
damaged during a match.
In closing, I should mention that some shooters apply the “KISS”
(Keep It Simple, Stupid!) principal and never go to the trouble of
making a blow tube with a cartridge case. They just cut off a piece
of clear tubing of the appropriate diameter and shove one end into
the rifle chamber. If the tubing is the correct diameter and the end
is cut square, it should create a seal when the end contacts the
transition step from the chamber to the throat or bore. In fact, this
simple approach should work as well or even better than making a
blow tube with a brass case or aluminum insert.
Wishing you great shooting,
Wayne


Last update: 7/28/13
It doesn’t take long for a black powder rifle shooters to realize that if
hard fouling builds up in the throat or bore, accuracy quickly suffers.
Therefore, if not wiping between shots, somehow moisture must be
injected into the bore to keep the fouling soft. When exhaling, the
human breath holds a good bit of moisture. Simply blowing down the
bore from the muzzle may help, a common practice of 19th century
hunters, but it’s not sufficient for most conditions and is not a
technique that’s compatible with prone BPCR silhouette competition.
It’s much easier and quicker to insert a “blow tube” into the open
breech end of the barrel after the spent case has been extracted.
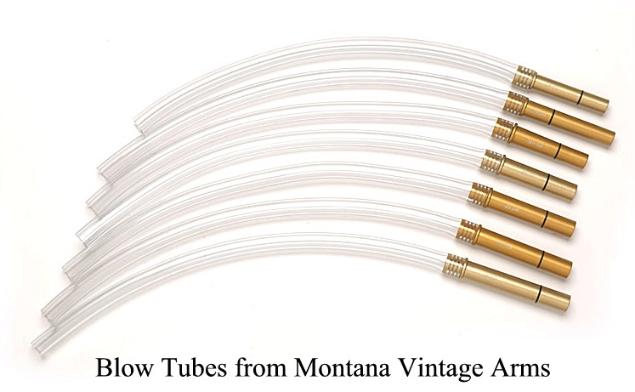
A couple of commercial suppliers manufacture blow tubes for various
common calibers, Montana Vintage Arms and Buffalo Arms being the
most well known. But making one is relatively simple and may be the
only solution if you’re shooting a less common cartridge. Below is a
Montana Vintage Arms photo displaying a selection of their blow tubes.
Since the anodized aluminum inserts are machined to minimum
dimensions to slide into most chambers for a specific cartridge, the O-
rings stop air flow and moisture from blowing back past the end of the
tube into the chamber. Locating the rings close to the tip is not
critical since the air flow is completely stopped.
It doesn’t take long for a black powder rifle shooters to realize that if
hard fouling builds up in the throat or bore, accuracy quickly suffers.
Therefore, if not wiping between shots, somehow moisture must be
injected into the bore to keep the fouling soft. When exhaling, the
human breath holds a good bit of moisture. Simply blowing down the
bore from the muzzle may help, a common practice of 19th century
hunters, but it’s not sufficient for most conditions and is not a
technique that’s compatible with prone BPCR silhouette competition.
It’s much easier and quicker to insert a “blow tube” into the open
breech end of the barrel after the spent case has been extracted.
A couple of commercial suppliers manufacture blow tubes for various
common calibers, Montana Vintage Arms and Buffalo Arms being the
most well known. But making one is relatively simple and may be the
only solution if you’re shooting a less common cartridge. Below is a
Montana Vintage Arms photo displaying a selection of their blow tubes.
Since the anodized aluminum inserts are machined to minimum
dimensions to slide into most chambers for a specific cartridge, the O-
rings stop air flow and moisture from blowing back past the end of the
tube into the chamber. Locating the rings close to the tip is not
critical since the air flow is completely stopped.
Blow Tube Construction:
To construct the most common style of blow tube you’ll need a
standard cartridge case, clear plastic tubing and a nipple of some type
to slip the tubing over. To maximize air flow go with the largest
diameter nipple that will fit. The case should extend the full length of
the chamber, certainly not shorter than the case length of the
cartridges being shot in the rifle. To match the chamber dimensions
as close as possible the case should be “fire-formed” in the rifle being
shot and not resized. Even better, since the brass will shrink slightly
in diameter after fire-forming, use a neck expander to slightly flare or
“bell” the mouth until the case just barely but easily slips fully into
the chamber.
An alternative to fire forming is to resize a new case using trial and
error to determine the correct resizing die setting in order to
minimally reform the case so it just barely slides fully into the
chamber. If the diameter of the case neck or mouth ends up too small
afterwards, use an expander die to enlarge the neck or mouth to the
maximum diameter that will fit. Slightly flaring or belling the
mouth may also result in a better fit.
The next step of drilling out the primer hole is likely the most
challenging of all. It can get a little “tricky” trying to hold or clamp
the case without deforming it while enlarging the primer hole. I used
a wooden dowel inserted into the case for the 1st blow tube I made.
The dowel was quickly formed by hand on a vertical belt sander. For
subsequent blow tubes I held the case in one of those hammer-type
impact bullet pullers; wrapping a thin folded piece of fine sand paper
around the case just in front of the base helped to hold the case from
rotating as the primer hole was enlarged. No doubt there are other
innovative methods to hold the case. When drilling out the primer
hole, start with a small diameter drill and work up in small increments
to the largest diameter required.
Once the primer pocket hole is enlarged, some shooters insert and
soldered in place a common brass yard hose splicer as the tubing
nipple. A more elegant solution is to drill and tap the hole to fit the
tapered threads of a 1/8” copper or brass pipe nipple that has been
cut in half (see photo below). One advantage of using a screw-in short
pipe nipple is you can take it apart and resize the case if it gets
damaged. If it does get damaged, since fire forming is no longer an
option, use the alternative trial and error case forming method
mentioned earlier. I may use this construction method for future blow
tubes due to the advantage of being able to easily repair a bent tube.
It also allows for easy cleaning by unscrewing both parts and tossing
them into the cleaning media when cleaning cases. The photo below
displays a threaded case and nipple ready for some clear plastic tubing.
Another option is to cut off the end of the pipe nipple and solder or
braze the nipple to the case rim. Or use a standard plumbers flaring
tool to flare and flatten the end of a short piece of copper tubing and
soldered it to the case rim. And yet another method is to drill out the
primer hole of two cases and solder the rims together back-to-back.
Then shorten the case that was not fire-formed and slip the tubing over
it. This latter method provides for a larger hole, allowing for maximum
air flow. Once the case and nipple section is finished, slip the plastic
tubing over the nipple and you’re ready to go. If necessary, heat the
end of the tubing in a small pan of water to soften it. Below is a photo
of the 1st .40-65 blow tube I made. The ¼” (0.375” OD) copper tubing
nipple was pushed into the enlarged primer hole and soft-soldered in
place.